|
Groundwater table |

|

|
|
Groundwater table |
|
|
The commands for managing the GWT are represented in the image below:
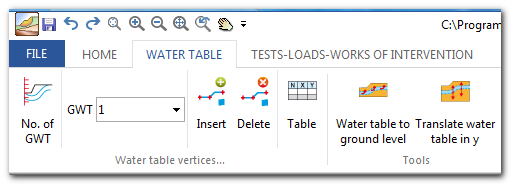
Nr GWT: This command gives the possibility to create (typing a number greater than one) the number of GWT corresponding to the number entered, or delete (by typing zero) all GWT previously created. Entering the number of GWT to create is activated the GWT window where each GWT is indicated with an integer number.
Insert (GWT vertices): This command allows the definition of GWT by inserting the points with the mouse directly on the profile.
Delete (GWT vertices): This command activates all vertices - just click on the ones you want to delete. Right click to apply the modifications.
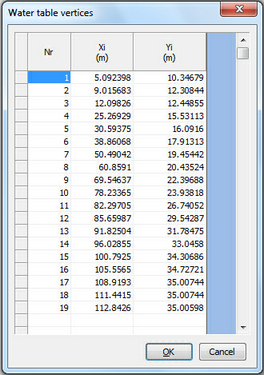
(GWT vertices) Table: This command opens a table where the vertices of the GWT can be managed. In the first column the vertices of the GWT are represented with integer numbers from 1 to n, the second and the third column contain the coordinates of the vertices with respect to the global reference system. If more GWT must be managed, a table is associated to each of them.
To define the GWT at least three points are needed.
|
GWT at ground level: Translates the GWT at ground level, and the the piezometric will coincide with the soil profile.
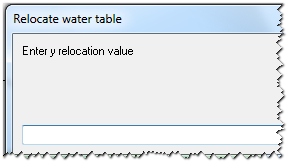
Translate GWT in y: Translates the GWT along the y axis by inserting a number (bigger or smaller that zero) in the window below. For a value grater than zero the GWT is translated in upwards direction (towards the positive part of the axis), while for a value smaller than zero, GWT is translated in downwards direction (towards the negative part of the axis).
Piezometers: Often used to monitor the level of the GWT (responsible of pore pressures that act along the failure surface of the soil), the command allows the management of n piezometers. By assigning zero to this command, all piezometers previously defined will be deleted.
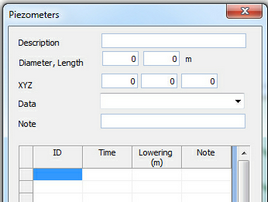
After assigning the number of piezometers to be used a window with a sequence of integer numbers is opened (numbers from 1 to n) to each number is associated a piezometer and to each piezometer is associated a table like the one in the image below.
|
Description: the field can be used for the description of the piezometer.
Diameter, Length: refer to the geometrical dimensions of de piezometer.
XYZ: Represent the coordinates of the insertion point (head of the piezometer) with respect to the global reference system.
In the first column is the ID to which is associated a registration time (in the second column) and tle level of the GWT (reading order from top to bottom).
To each piezometer is associated a table for it's own properties. |
Find GWT levels: After inserting the piezometers this command allows to interpolate the measuring points and draw a polyline that defines the level of groundwater.
In order for the Find GWT levels command to work properly it is necessary that each piezometer inserted has the same number of readings.
|
Slope allows the management of water under pressure through the command Piezometric surf.
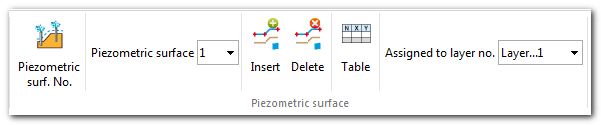
Piezometric No: From this command can be created the piezometrics (inserting a numbr greater than one) or they can be deleted (by typing zero all piezometrics previously created are deleted). Entering the number of piezometers that must be managed, two windows are activated: Piezometric /Assigned to layer no from where the piezometric can be associated to a layer.
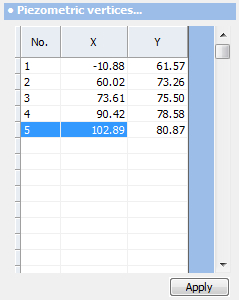
Insert (Piezometric vertices): This command allows the definition of the piezometric level by inserting the points with the mouse directly on the profile. While the vertices are inserted with the mouse a table for the vertices coordinates is filled in the right-side menu.
Detele (Piezometric vertices): This command activates all vertices of the chosen piezometric level - just click on the ones you want to delete. Right click to apply the modifications.
© GeoStru Software